
LOG MODIFICATIONS SCRIPT
Tell the driver “We are not able to edit drivers logs but we can instruct you on how to make a log edit on your own”
NOTE: We will ONLY teach a driver or Admin User how to perform a log edit so that they know how to conduct edits themselves. We will NOT perform log edits for them.
1. Logs Modifications as Carrier
2. Keep in mind that in the majority of cases it is not legally allowed to edit an Automatic Driving Event (see section V). There will likely be many drivers/ admins calling in requesting to do so. Assist them if possible, but do not be afraid to inform them if the edit they are requesting is not authorized per ELD law. Instead, instruct them on how to input a detailed remark to the Driving event in question if they are wishing to take some type of action for it.
➢ LEGAL REFERENCE: No editing automatic drive time: eCFR :: Appendix A to Subpart B of Part 395, Title 49 -- Functional Specifications for All Electronic Logging Devices (ELDs), Section 4.3.2.8.2
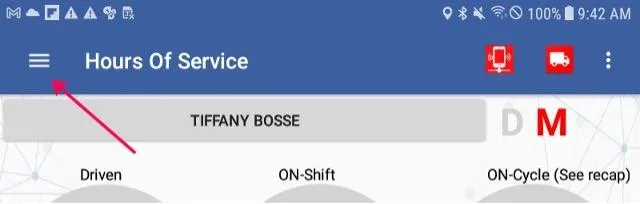
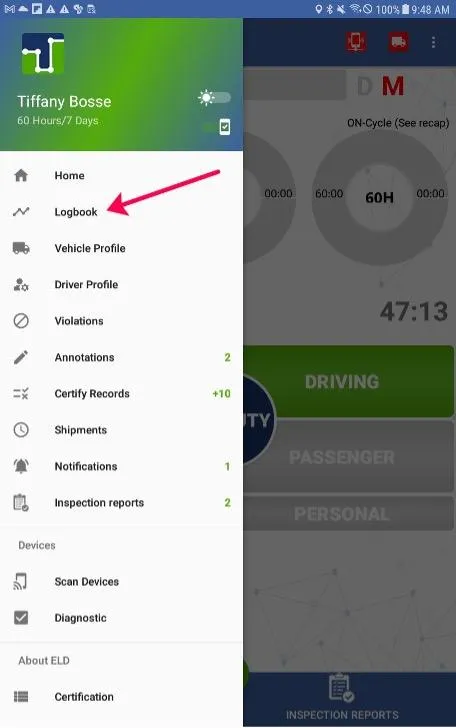
O. Performing an Edit on the application: From the home screen, open the Main Menu by tapping the 3 horizontal white lines in the upper left corner and then select Logbook.
1. From here, select the date you are needing to edit.
2. Tap the circular green “+” in the bottom right corner and select Edit Logs.
3. Tap Move. If needed, select the status that the existing status needs to be changed to (i.e. selecting Off Duty to change a previously On Duty status).
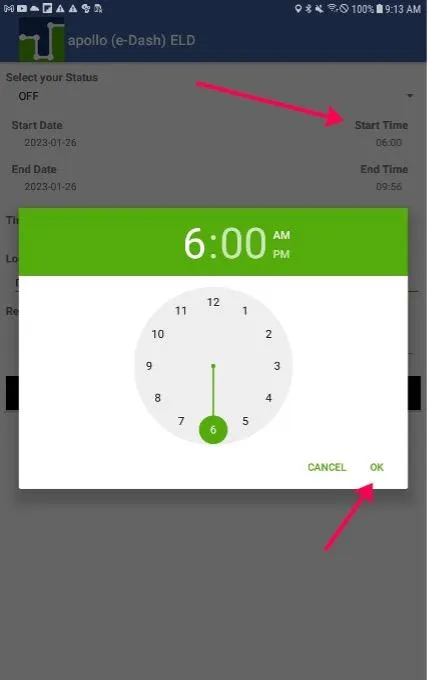
4. Tap on the start time and end time in this section of the screen to access a clock through which you can make your selection. Make sure to confirm that the location is correct and then input a detailed remark.
5. Tap Confirm Changes to finalize the edit.
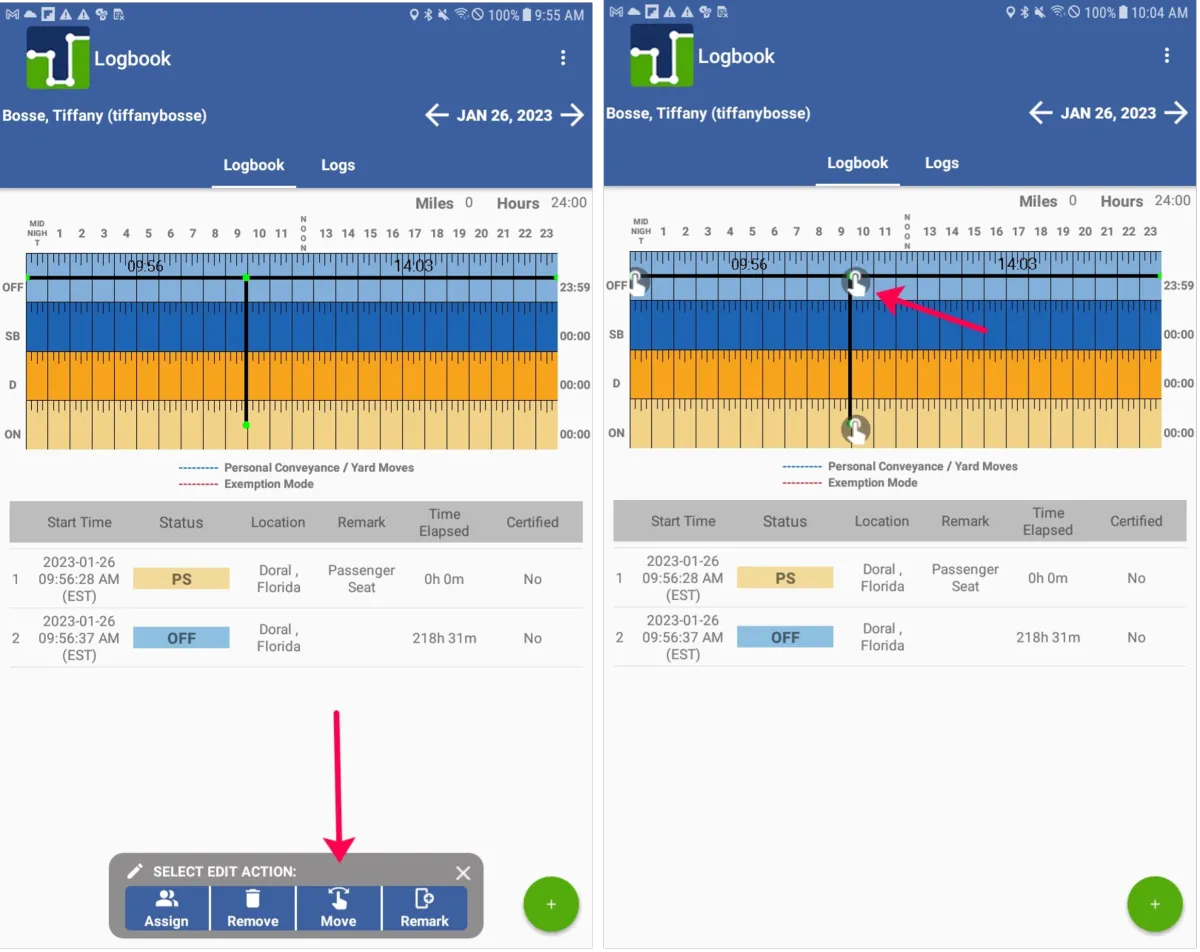

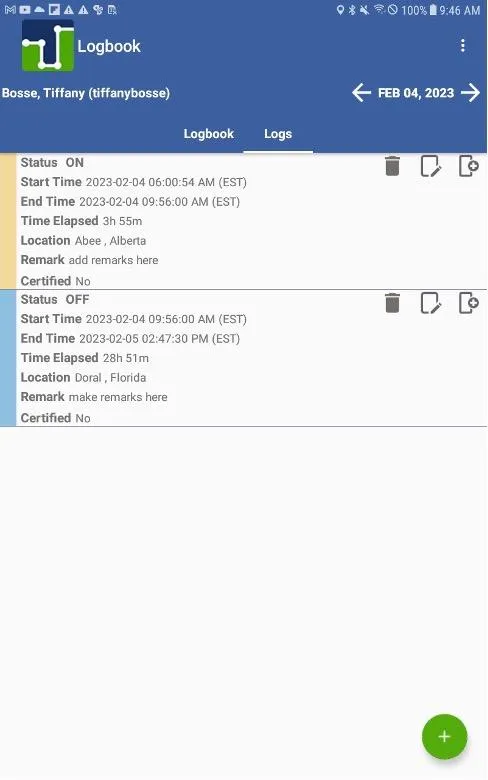
6. Alternatively, if you wish to directly edit specific log events, once you have selected your date, you can tap on the “Logs” button to access the event list.
➢ To edit a status here, tap on the notebook and pencil icon.
➢ To delete an event tap the trash can icon
➢ To add a remark tap the notebook with “+” icon.
➢ To add an event (as will be discussed in section C) tap the green circular “+” icon in the bottom right.

P. If you wish to insert a missing/ past status, select Logs in the upper middle portion of the screen and then tap the circular green “+” in the bottom corner (shown in the image above) to access the Add Log page.
1. From this screen, select the type of status you would like to input by tapping the currently displayed status (in the provided example below it is “ON” for On-Duty, Not-Driving).
2. Use the scrolling menu that will appear at the bottom of the screen to select the new status you would like to input and then click Confirm Changes. In the example I have chosen to select “OFF” for Off-Duty.
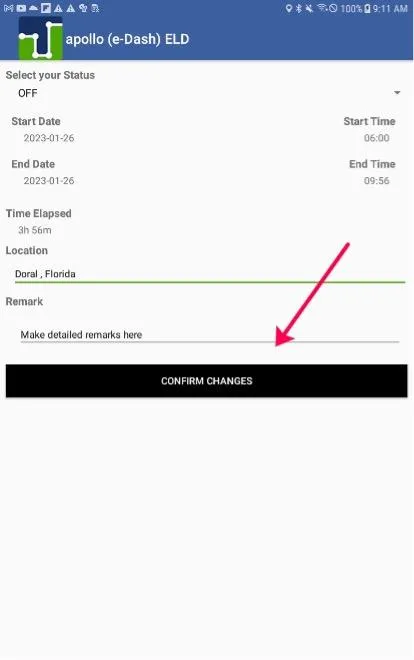
3. Now confirm the start time for the event you are inserting by clicking the calendar icon next to Start Time. The date should remain the one that you were previously viewing, but you will need to select the actual starting time for the individual log event you are adding (the system will default the ending time of this event to the starting time of the next recorded event/ status) and tap Save. In the example I am setting the Start Time 6:00 AM.
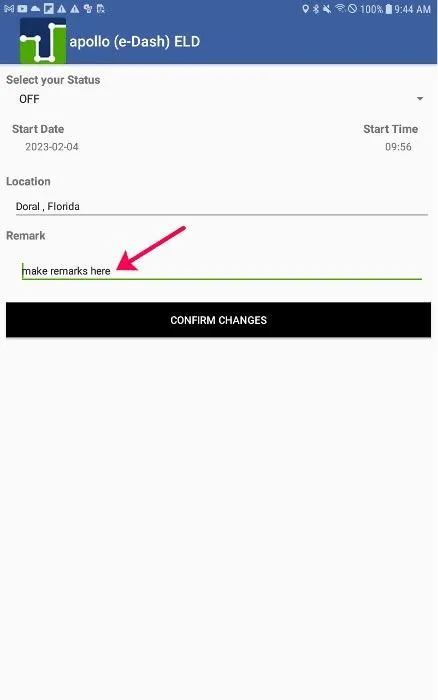
4. If the location information is missing or inaccurate, input it on the designated line as well. Otherwise, input a remark for the reason you are adding the status by clicking into the textbox next to Remark. Make sure to include as much detail as possible as to why you are inputting the remark.
5. Tap Done on the keyboard to make it disappear when finished.
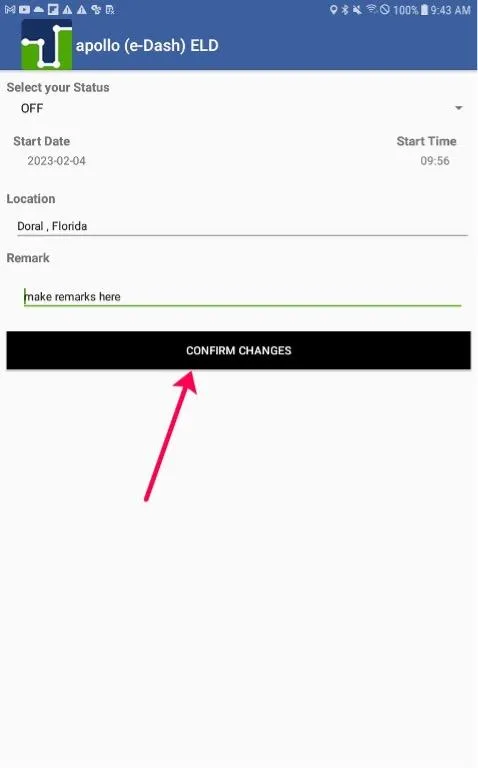
6. Once you have input all of the required information, click Confirm Changes to add the event to the logs.
7. You should now see the input status in the time slot you selected. In the example, you can see an Off-Duty status has been input beginning at 6 AM EST and ending at 9:56 PM EST at the point that the following Driving event begins.
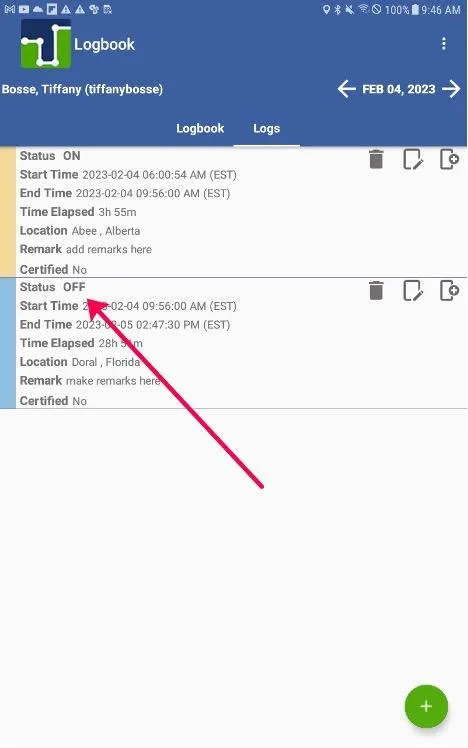
8. After the Input Status: ON DUTY Status from 6 AM to 9:56 AM, OFF DUTY from 9:56 AM to 2:47 PM

© 2023 Transcare - All Rights Reserved