
MANAGE
The first tab inside the Apollo portal is the Manage tab. With this tab you can:
Edit carrier information
Add drivers
Configure drivers
Enable and disable drivers
Add home bases
Assign drivers to home bases
Create assets like trucks or trailers
Configure notifications (i.e., vehicle inspections with defects or driver violations)
Select the items below to direct to the information faster:
Carrier
Use the dropdown menu to select the Carrier and then click on the first button under ACTIONS to edit your carrier information:

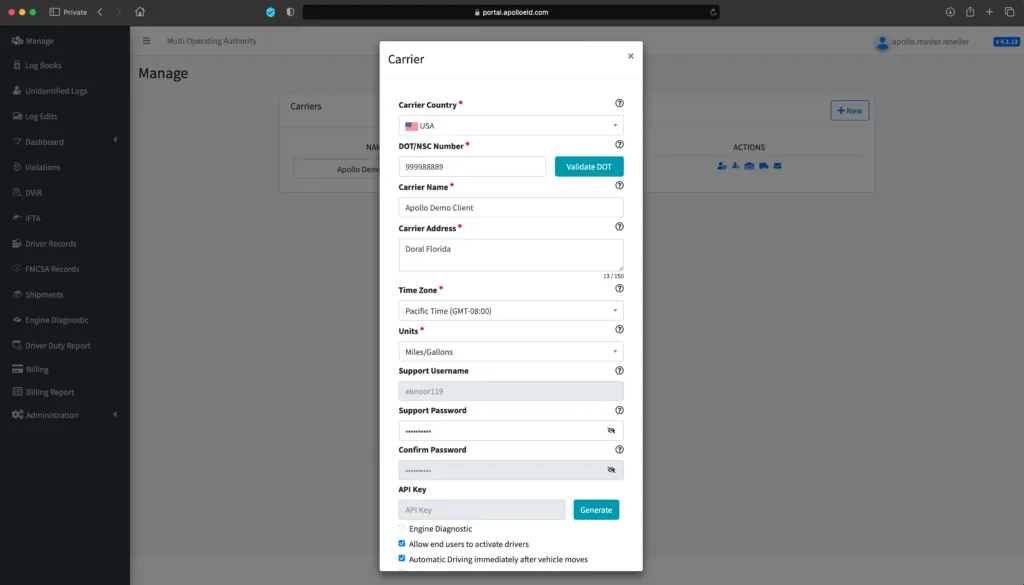
DOT/NSC Number: Enter your USDOT or NSC number here.
Verify your DOT number by clicking the Validate DOT button. If the system can locate the DOT number in the database, it will display the associated carrier’s name and address. By verifying this information, the carrier name and address will automatically populate in the fields mentioned below.
Carrier Name: Enter your company name
Carrier Address: Enter your primary business address here
Time Zone: Use the dropdown menu to specify your home terminal time zone
Units: Use the dropdown menu to select desired units of measure
Support Username and Password: You can define a support username and password to be used by your support personnel to configure an ELD
Account Level Options: There are different options you can enable or disable based on your preferences. Use the checkboxes to toggle these features on or off
Engine Diagnostic: Enables DTC codes or engine diagnostics
Automatic driving immediately after the vehicle moves: This option allows you to transition to automatic driving just 1-3 seconds after the vehicle starts moving. If you disable this option, then there is a one mile radius where the ELD can move and it will not trigger automatic driving. Please remember that to be compliant this option must remain enabled
Force asset/ECM device connection: Forces the ELD to connect only to the ECM devices defined in the portal. If you disable this option you are allowing your drivers to scan and select any ECM device nearby the ELD
Drivers must use portal assets list: Forces the ELD and the driver to only select a tractor or trailer that has been previously defined on the portal. By enabling this option drivers are not allowed to create a new vehicle. If you disable this option drivers can create and enter their own vehicle or trailer information directly in the application
Please do not forget to click on the Save button after making modifications!
Drivers
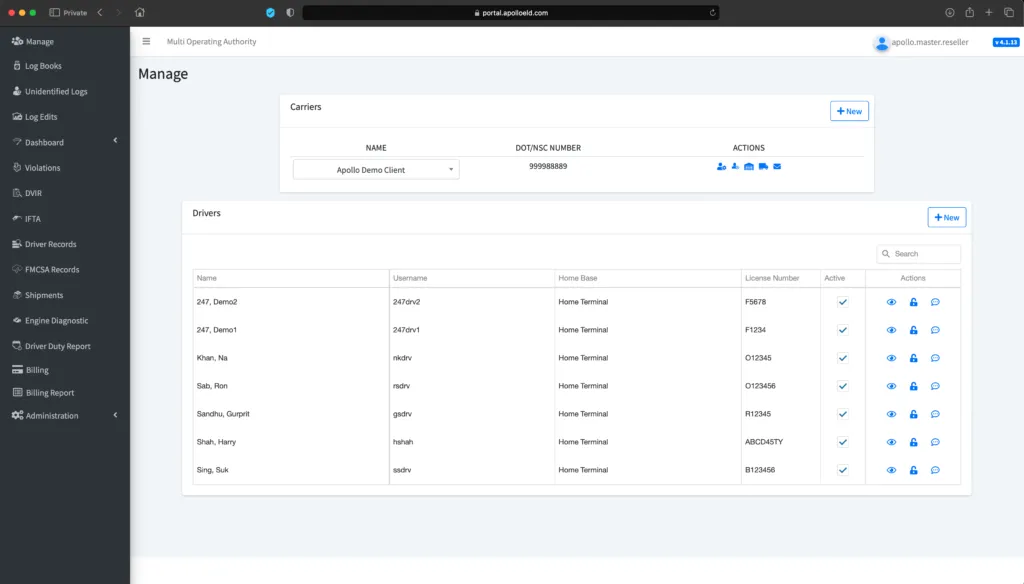
The next button on the ACTIONS menu of the Manage tab is the Drivers button.

Here you can manage all your driver settings including:
Enable or disable drivers: If you need to temporarily deactivate a driver, click on the checkbox under the Active column for the specific driver. If you don’t make any changes you can reactivate the same driver by enabling the checkbox.
Unlock Drivers: In a situation where a driver cannot access the ELD device they are currently logged into, the ELD system will not allow that driver to log into a different device. For the driver to do so, you will need to click on the Unlock icon and unlock the driver’s profile so they can then log in on a different device.
Send Notification: If you need to send a quick notification message to a driver, click the button. On the Notification popup window, enter the Title and body of the message. Click Send Notification to send the message. This message will be delivered only if the driver is currently locked on the ELD.

Configure Driver Details
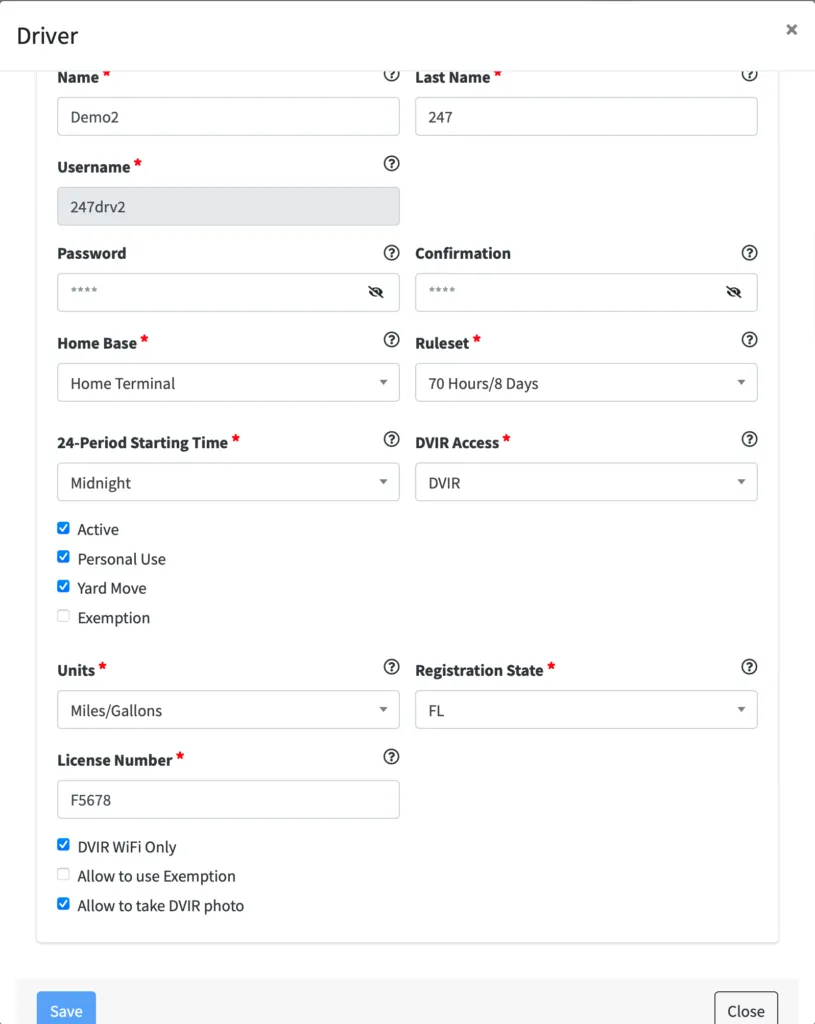
To configure a new driver or modify a driver’s current configuration, click on the button. Here are the options for configuring a driver:

Name: Enter driver first name
Last Name: Enter driver last name
Username: Assign a unique Username for the driver to use to login to the ELD application (*Note that the Username cannot be updated later*)
Password: Set the driver password to login to the ELD application
Home Base: Select the driver’s home base
Ruleset: Select the driver’s ruleset from the dropdown menu. If a driver later changes the ruleset directly on the app, this will update the server and it will be changed accordingly.
24-Period Starting Time: Select the default start time of day to be used on the driver’s logs
DVIR Access: There are three different settings for vehicle inspections:
DVIR provides full access to the vehicle inspection function
No DVIR will completely remove the vehicle inspection function from the mobile app
DVIR Only requires a different application (mostly used by mechanics). This only provides access to the vehicle inspection functions without access to ELD-related functionality.
Active checkbox: Uncheck to deactivate driver access
Personal Use checkbox: Check to allow driver to use Personal Use (personal conveyance)
Yard Moves checkbox: Check to allow driver to use Yard Moves
Exemption checkbox: When selected, this indicates the driver is fully exempt from Hours of Service rules (i.e., a mechanic who occasionally drives the vehicle to perform road tests). Once selected, you can choose from a preset list of exemptions or enter a custom reason for the exemption
Units: Use the dropdown menu to select desired units of measure for the driver on their application
License Number and Registration State: Enter the driver’s license number as well as the registration state
Additional Driver Configuration Options: There are three additional options to configure a driver:
When enabled, DVIR Wi-Fi only means that images taken during a vehicle inspection are only uploaded to the server when the ELD is connected to a Wi-Fi network.
When enabled, Allow to use exemption lets the driver indicate when they are under an exemption and input the information related to that exemption directly on the ELD.
When enabled, Allow to take DVIR photo permits drivers to take pictures while performing vehicle inspections.
Please do not forget to click on the Save button after making modifications!
Home Bases
The third button on the Manage tab is the Home Bases button. Here you can create home bases and assign drivers to them.

To create a home base:
1. Click on New button
2. Enter the Location Name
3. Input the full Address and click on the location pin icon to verify this location on the map.
4. Specify the Time Zone for this location
5. Check Set as Main Office if this Home Base is your primary location
6. Click Save once the information has been input.
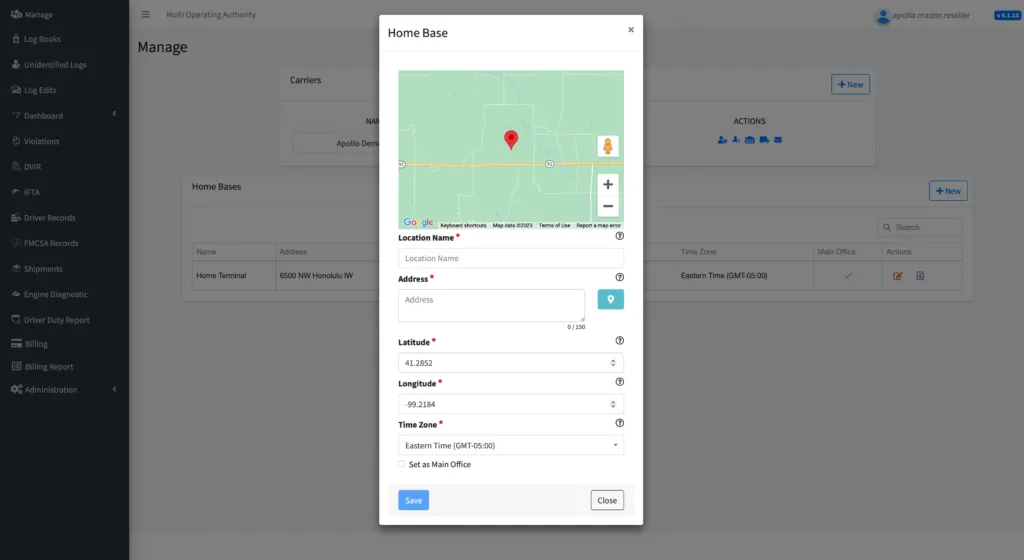
To assign existing drivers to this home base, click on the icon next to the Home Base under the Actions menu. Search for the drivers you wish to add and click on the Assignment checkbox to assign them to this home base. Click Save to complete the assignment.

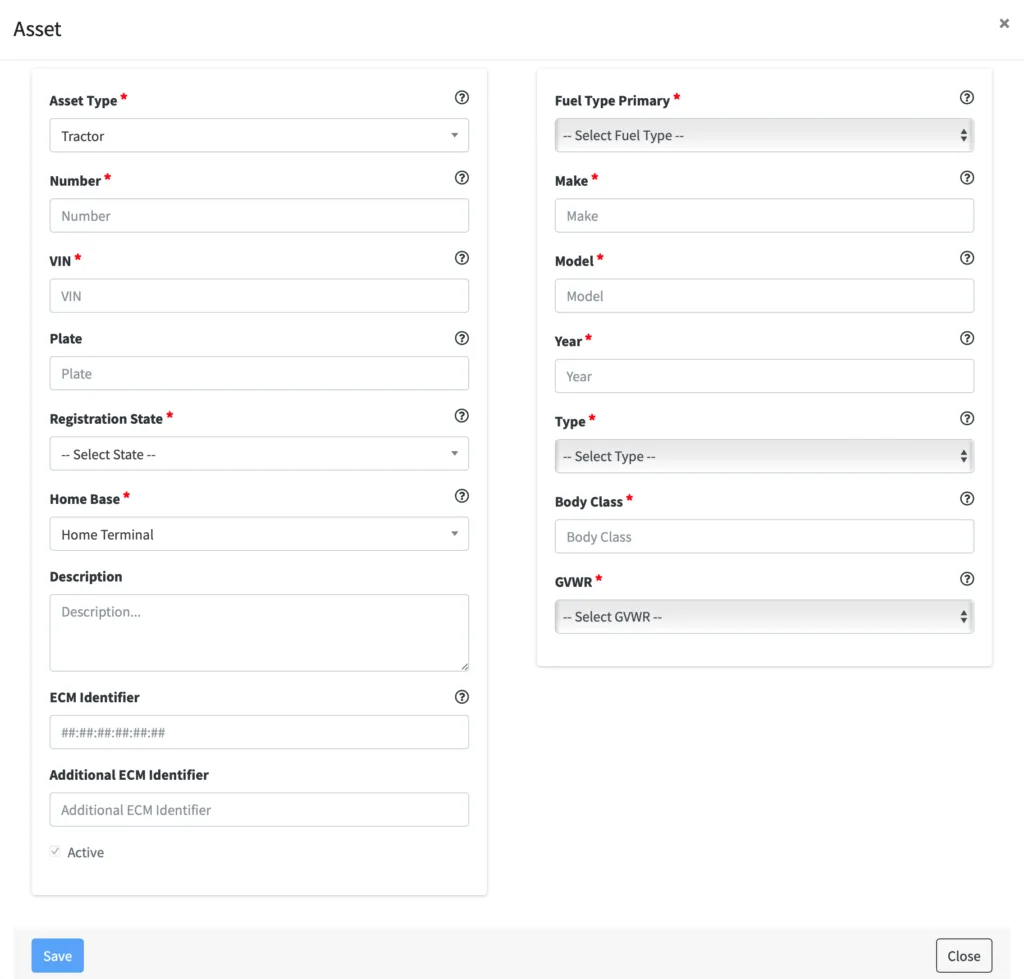
Assets
Click on the small blue truck icon under ACTIONS to manage your assets.

Click on New to add a new tractor or trailer asset and input the following:
Asset Type: Select the type of asset: tractor (vehicle) or trailer
Number: Input a name or number for the asset
VIN: Enter the FULL 17 digit VIN. Once the VIN number is entered, the system will check a public domain database to get detailed information about the vehicle such as fuel type, make and model, year, etc. This information will later be used on the enhanced IFTA module.
Plate: Enter the license plate number
Registration State: Use the dropdown menu to select the license plate registration state
Home Base: Use the dropdown to assign the asset to a home base
Description: Optionally, you may add a description of the asset
ECM Identifier: This refers to the ECM device’s MAC address. If the Force Asset/ ECM-device connection feature is enabled on the account, the vehicle will only be able to connect to the ECM device with the defined MAC address.
Additional ECM Identifier: Optionally, you may use this field for additional information regarding this vehicle’s ECM device. For example, you can input the device’s serial number or any other type of ID that makes it easier for you to document which device is installed to which vehicle.
Please do not forget to click the Save button when you’re finished!
Notifications
The final option under ACTIONS is the Notifications button.

Click the New button to create a new notification:
Home Base: Select the home base to which the notification applies
Name: Create a name for the new notification
Emails: Enter the email addresses of all individuals who should receive this notification.
Note that if inputting multiple addresses they must be formatted exactly as in the example text: “name1@email.com, name2@email.com, name3@email.com”
Type: Use the dropdown to select the type of notification. The system supports the following types of notifications:
Unidentified Driving: Triggered when a vehicle moves and a driver is not logged into the ELD
HOS Violation: Triggered whenever a driver has exceeded any of the allowed times for the shift, cycle or drive time
ELD Malfunction: Triggered when an ELD is not functioning properly.
Driving without engine data: Triggered when a driver switches to the driving status but is not connected to the ECM device installed on the vehicle DVIR Non- Compliance
Special Moves: Triggered when a driver uses personal use or yard moves
No PRE-TI before: Triggered if a driver moves the vehicle without having performed a vehicle inspection at beginning of shift
Rejected Carrier Edit: Triggered when a driver rejects a carrier-proposed edit to the driver’s logs


© 2023 Transcare - All Rights Reserved